
In this article, we will see how to permanently change hostname in Linux. Many times you might have noticed that setting hostname is absolutely critical for setting up of different server and services. If you try to set hostname using hostname command then it would temporarily show in current terminal session but as soon as you open a new terminal session and login, the set hostname will disappear and the default or older one will only be showing. So to make hostname permanent you can follow few methods explained in below section.

How to Permanently Change hostname in Linux
Also Read: How to Install xterm on Ubuntu 20.04 LTS (Focal Fossa)
If you are looking to permanently change user's hostname with or without logging off or restarting the system then you can use below methods accordingly.
Method 1: Using hostnamectl command
The best way to permanently change hostname is through hostnamectl command line utility. For example, if you are looking to change the hostname of your system to ubuntu then you have to run hostnamectl set-hostname ubuntu command as shown below.
$ hostnamectl set-hostname ubuntu
To make the changes in current terminal session only, run exec bash command as shown below.
$ exec bash
itsfosslinux@ubuntu:~$
Method 2: Using /etc/hostname (requires reboot)
The other way which you can use to change hostname is through /etc/hostname file. But this method requires you to reboot your system. You can simply edit the file using nano editor and add the hostname as shown below.
$ sudo nano /etc/hostname
ubuntu
Then reboot your system using either sudo init 6 or sudo reboot command as shown below.
$ sudo init 6
After successful reboot, login to your system using user's credentials, you will see updated hostname in your terminal session as shown below.
itsfosslinux@ubuntu:~$
Method 3: Using nmtui command
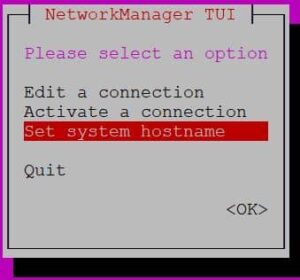
Finally, you can also employ network manager utility called nmtui to change the hostname as shown below.
$ sudo nmtui
You will see below window appearing on your screen. Use arrow keys to select Set system hostname option and then click Enter to set the hostname.
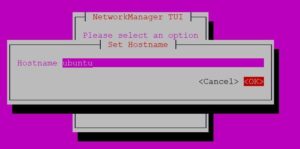
Here you have to set the hostname and use tab to click on OK as shown below.
It should show you below message which confirms successful set of hostname to ubuntu.
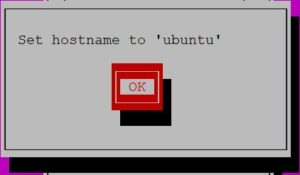
Now you can simply run exec bash command to change hostname from current terminal session as shown below.
$ exec bash
itsfosslinux@ubuntu:~$
Troubleshooting
Sometimes it is possible that even after changing the hostname, it might reflect in current session but as soon as you open a new terminal session you still see the old or no hostname. But if you check /etc/hostname file, you will see updated hostname exists in the file. So you might wonder what exactly went wrong. Actually, this problem happens when user default shell is set to /bin/sh. To deal with this problem, you have to change the user's default shell to /bin/bash. This can be done by using below command.
$ sudo usermod --shell /bin/bash itsfosslinux
Now if you start a new terminal session and login with user credentials then this time you will see hostname displayed on the prompt as shown below.
itsfosslinux@ubuntu:~$